
Automating Screenshot Uploads to App Store Connect with GitHub Actions

Introduction
In iOS development, building an app and manually capturing screenshots for multiple devices can be a tedious and time-consuming task. Automating these processes using GitHub Actions helps streamline the workflow, especially when dealing with multiple screen sizes and languages.
This blog post demonstrates how to automate the entire process—building the app, launching it in an iOS Simulator, capturing screenshots, and uploading them to App Store Connect. Leveraging App Store Connect’s API, this CI/CD pipeline can save time, ensure consistency, and improve efficiency during app release.
Why Automate?
Manually building apps, launching them in simulators, and capturing screenshots can be tedious. This becomes even more challenging when managing multiple devices and scenarios. GitHub Actions provides a platform to automate these tasks by creating a workflow that does everything from setting up dependencies to building, launching, and taking screenshots of your app.
Step-by-Step Guide
Here’s how I built this automation pipeline:
1. Setting Up the Workflow
We start by defining the GitHub Actions workflow file (iOS_Screenshot_Upload.yml). This file outlines the steps the workflow will take whenever changes are pushed to a specific branch (e.g., ScreenshotBuild).
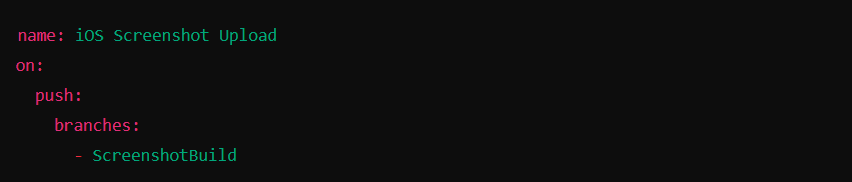
This ensures that the workflow triggers when code is pushed to the ScreenshotBuild branch.
2. Environment Setup
Setting up the environment is the next critical step. We need Python, Ruby (for CocoaPods), and Node.js for React Native dependencies.
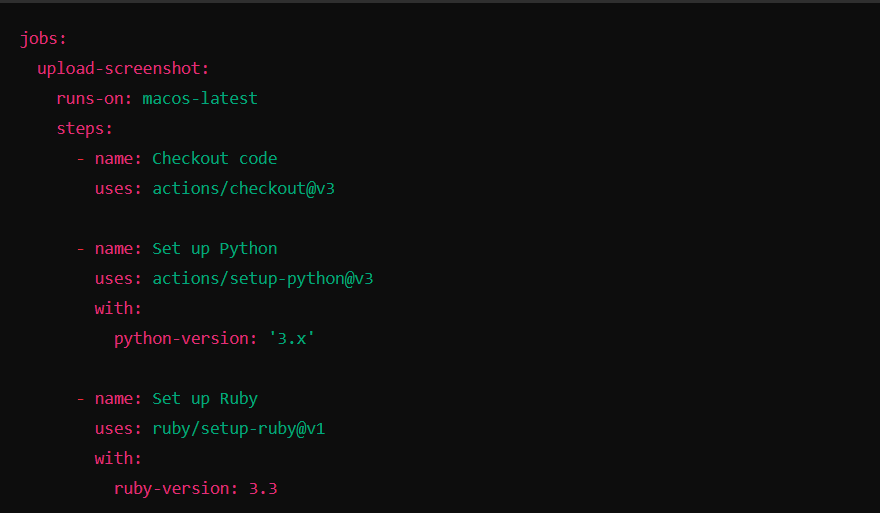
We also use CocoaPods for dependency management in iOS and cache them to speed up subsequent builds.
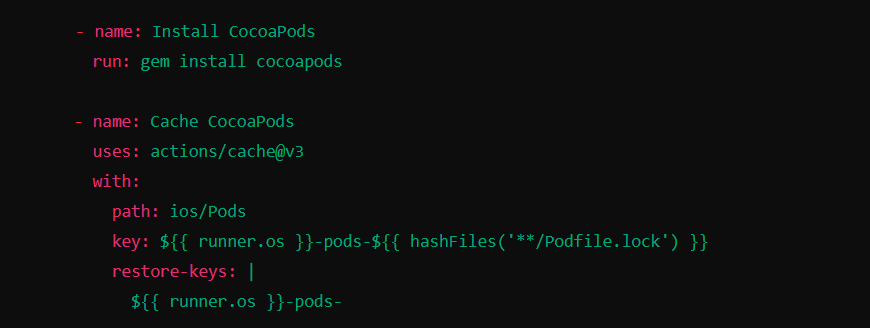
3. Installing and Updating Pods
We integrate CocoaPods with our project by updating and installing the necessary dependencies:
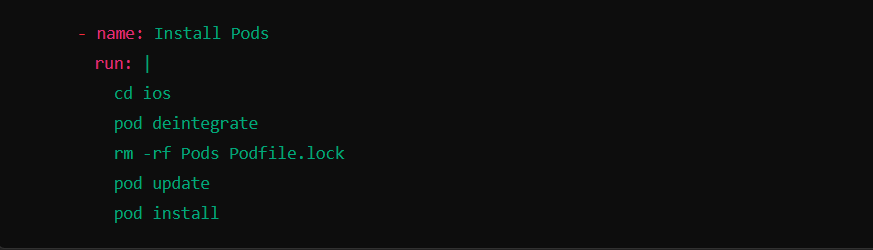
4. Building the App
To simulate the app on a specific device, we build the app for the iOS Simulator (in this case, using the iPhone 14). Before building, we clean the build folder and Derived Data:
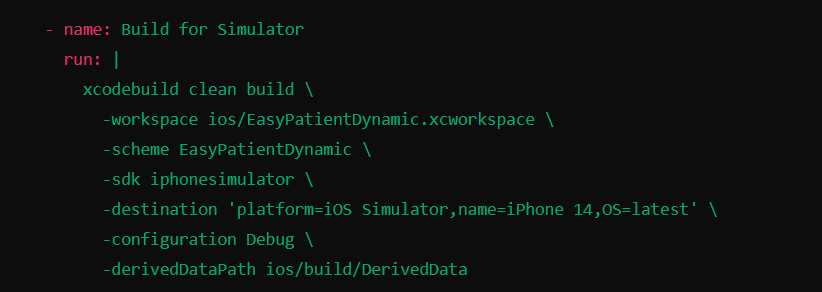
This step compiles the app and prepares it for installation on the simulator.
5. Booting the Simulator and Launching the App
After successfully building the app, we find the UUID of the desired simulator, boot it, and install the app.
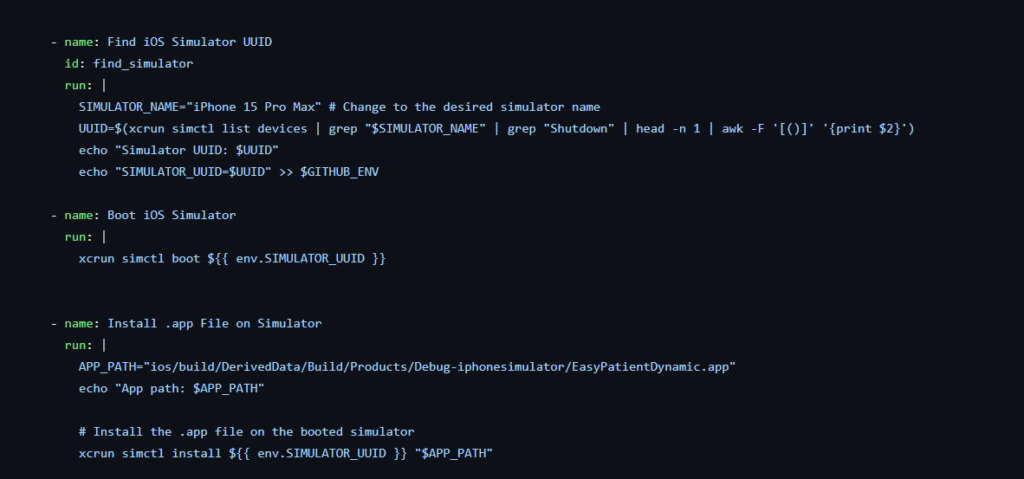
The app is launched using its Bundle ID.
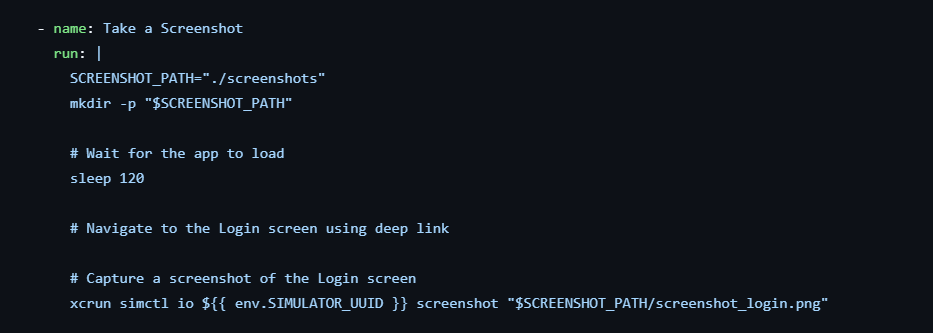
6. Capturing the Screenshots
Screenshots are captured using UUID of emulator and path defined to save screenshot as desired place.
7. Uploading and Downloading Screenshots
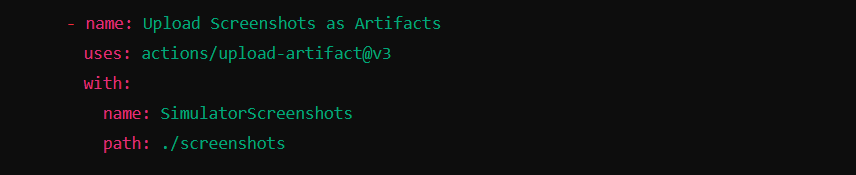
The screenshots are uploaded as artifacts so that they can be easily accessed:
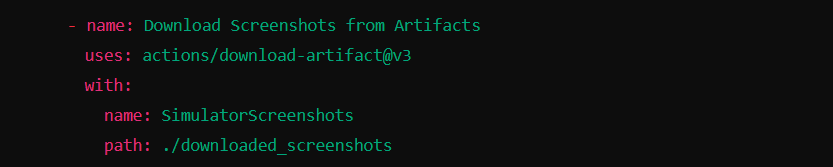
To download them later, we use the download-artifact action:
8. Create Screenshot Set
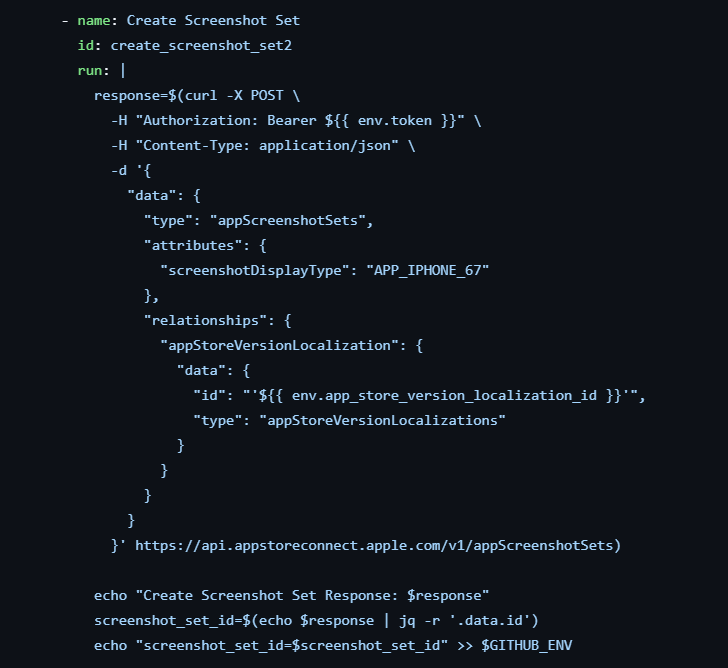
The first API request is responsible for creating a new screenshot set associated with a specific app version on App Store Connect. A screenshot set groups screenshots that are specific to a particular display type, like for iPhones, iPads, or other devices.
- URL: /v1/appScreenshotSets
- Request Type: POST
- Description: This API creates a screenshot set for a specific app version localization.
- Payload: It includes details such as screenshotDisplayType, which specifies the type of screenshots (e.g., iPhone 6.7″ display), and the ID of the app’s version localization.
- Response: The API returns an ID for the newly created screenshot set, which is later used to upload screenshots to this set.
9. Upload Screenshots to App Store Connect
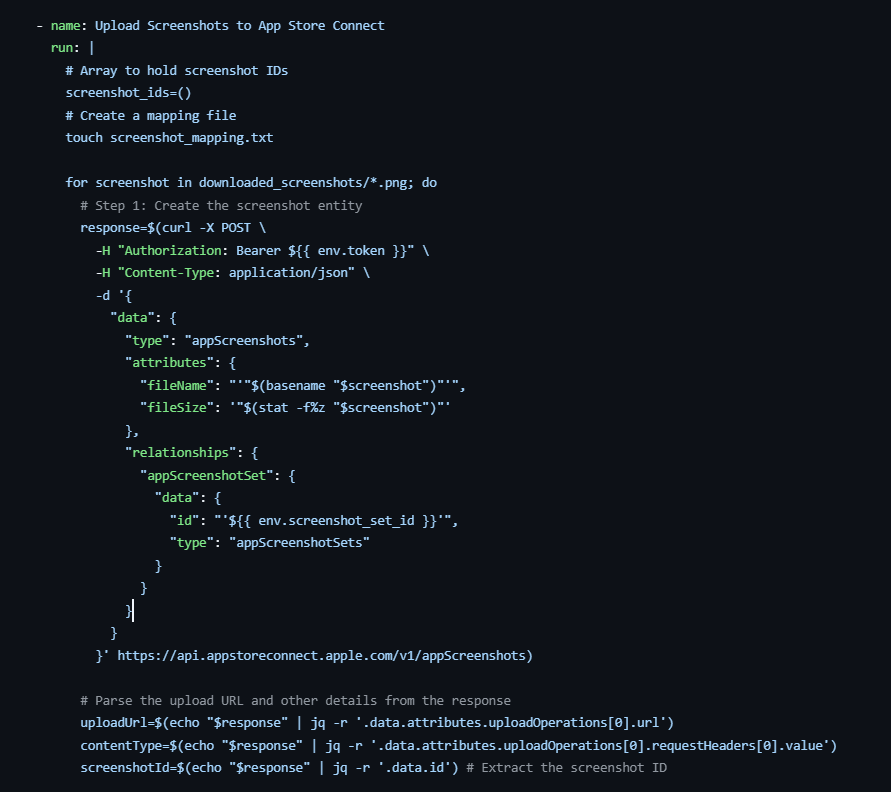
Once the screenshot set is created, this API request uploads screenshots to the App Store Connect. The process is divided into two steps: creating an entity for each screenshot and uploading the actual image file.
- URL: /v1/appScreenshots
- Request Type: POST
- Description: This API request initiates the upload process by creating an app screenshot entity. It defines the filename, file size, and links it to the appScreenshotSet.
- Response: The response contains details like the upload URL and Content-Type headersneeded for the next step, along with the screenshotId, which uniquely identifies the screenshot.
10. Upload Screenshot File
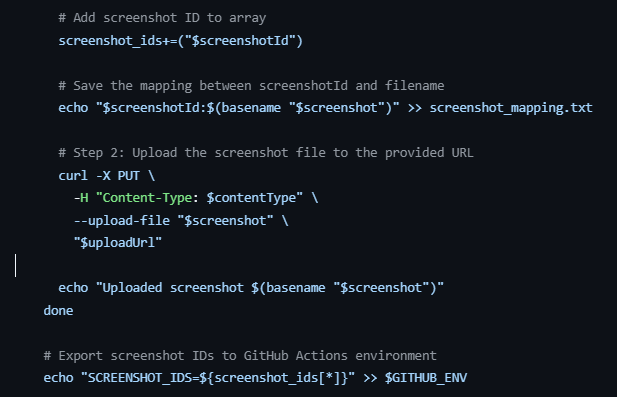
After creating the screenshot entity, the next API call uploads the actual image file to the provided URL.
- URL: The URL is dynamically provided in the previous response (uploadUrl).
- Request Type: PUT
- Description: This API uploads the screenshot image to the App Store Connect servers. It uses the Content-Type header specified earlier, and the image file itself is uploaded to the provided URL.
- Response: This step confirms the upload of the screenshot file to the server.
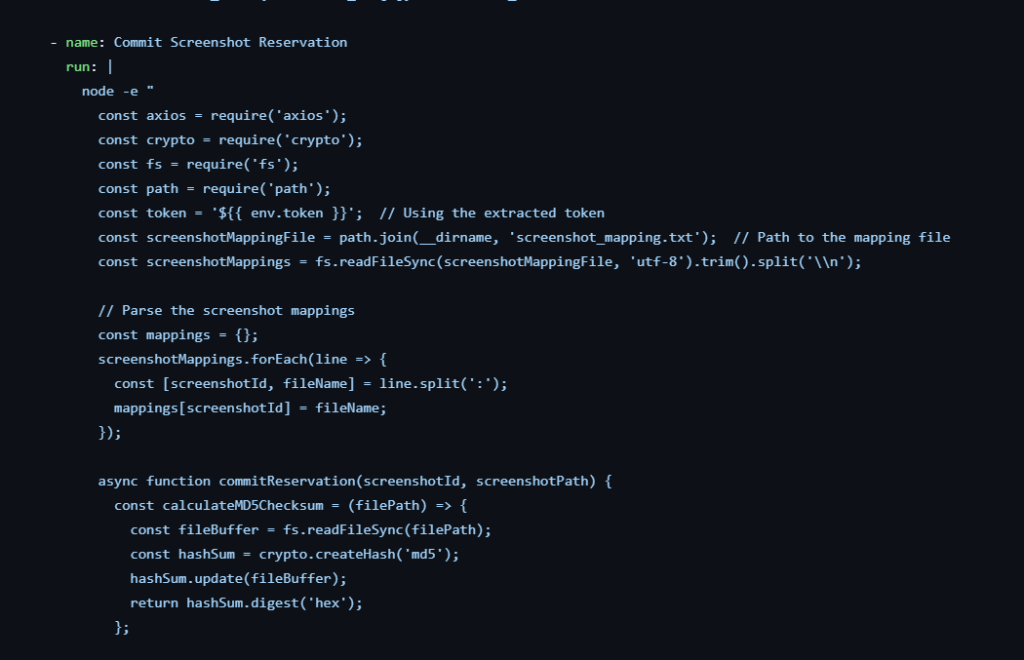
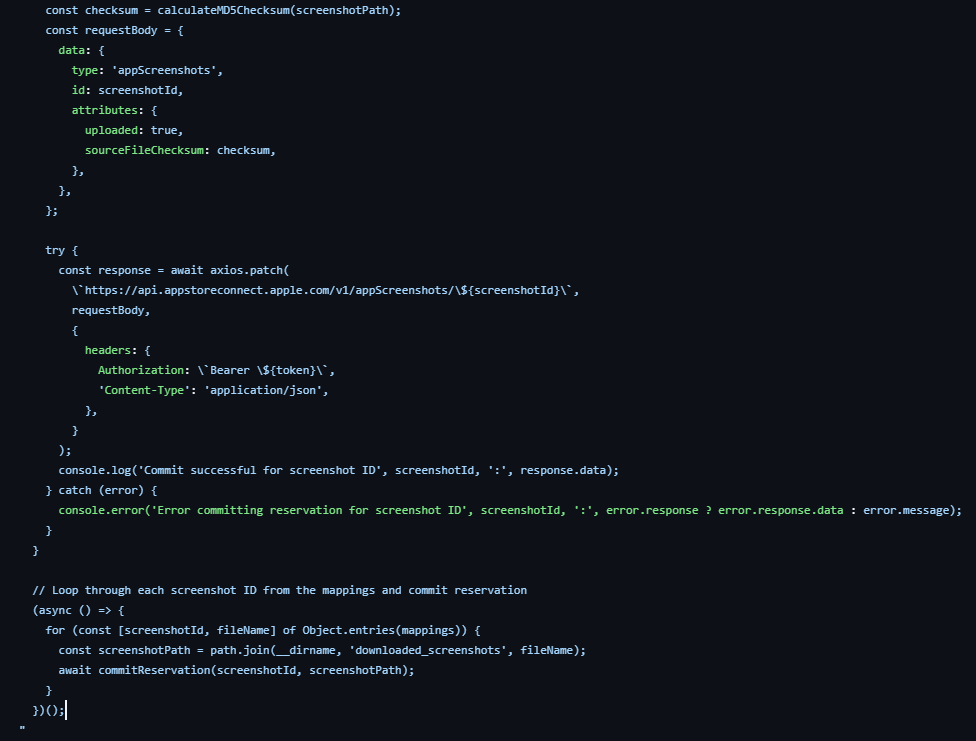
11. Commit Screenshot Reservation
Finally, after uploading the screenshot, the reservation for the uploaded screenshot needs to be committed to App Store Connect. This ensures the screenshot is marked as uploaded and ready for review.
- URL: /v1/appScreenshots/{screenshotId}
- Request Type: PATCH
- Description: This API marks the screenshot upload as complete by committing the reservation. The payload includes the MD5 checksum of the uploaded file to verify its integrity.
- Response: The API responds with the status of the screenshot reservation, confirming that the screenshot is now available for the app version on the App Store.
Conclusion
By automating the iOS app testing and screenshot capture process, developers can avoid repetitive manual tasks and focus more on enhancing app features. This GitHub Actions workflow demonstrates how to build, launch, and capture screenshots on an iOS Simulator, followed by uploading those screenshots directly to App Store Connect. With this setup, you can easily extend automation to cover additional devices and screen variations, or even other App Store Connect tasks such as submitting apps for review.
Integrating automation into your development process can enhance productivity, minimize errors, and streamline app store submissions, making your iOS development lifecycle much smoother.
Clean Code vs. Overengineering: Where Should Developers Draw the Line?
Clean code reduces unnecessary complexity; overengineering invents it. A practical guide to using context, evidence, and the cost of change to know when to stop adding abstractions...
Read More
Kafka vs RabbitMQ vs AWS EventBridge: Choosing the Right Architecture Based on Business Requirements
Compare Kafka, RabbitMQ, and AWS EventBridge based on scalability, routing, event streaming, replay, infrastructure, and business requirements to choose the right architecture...
Read More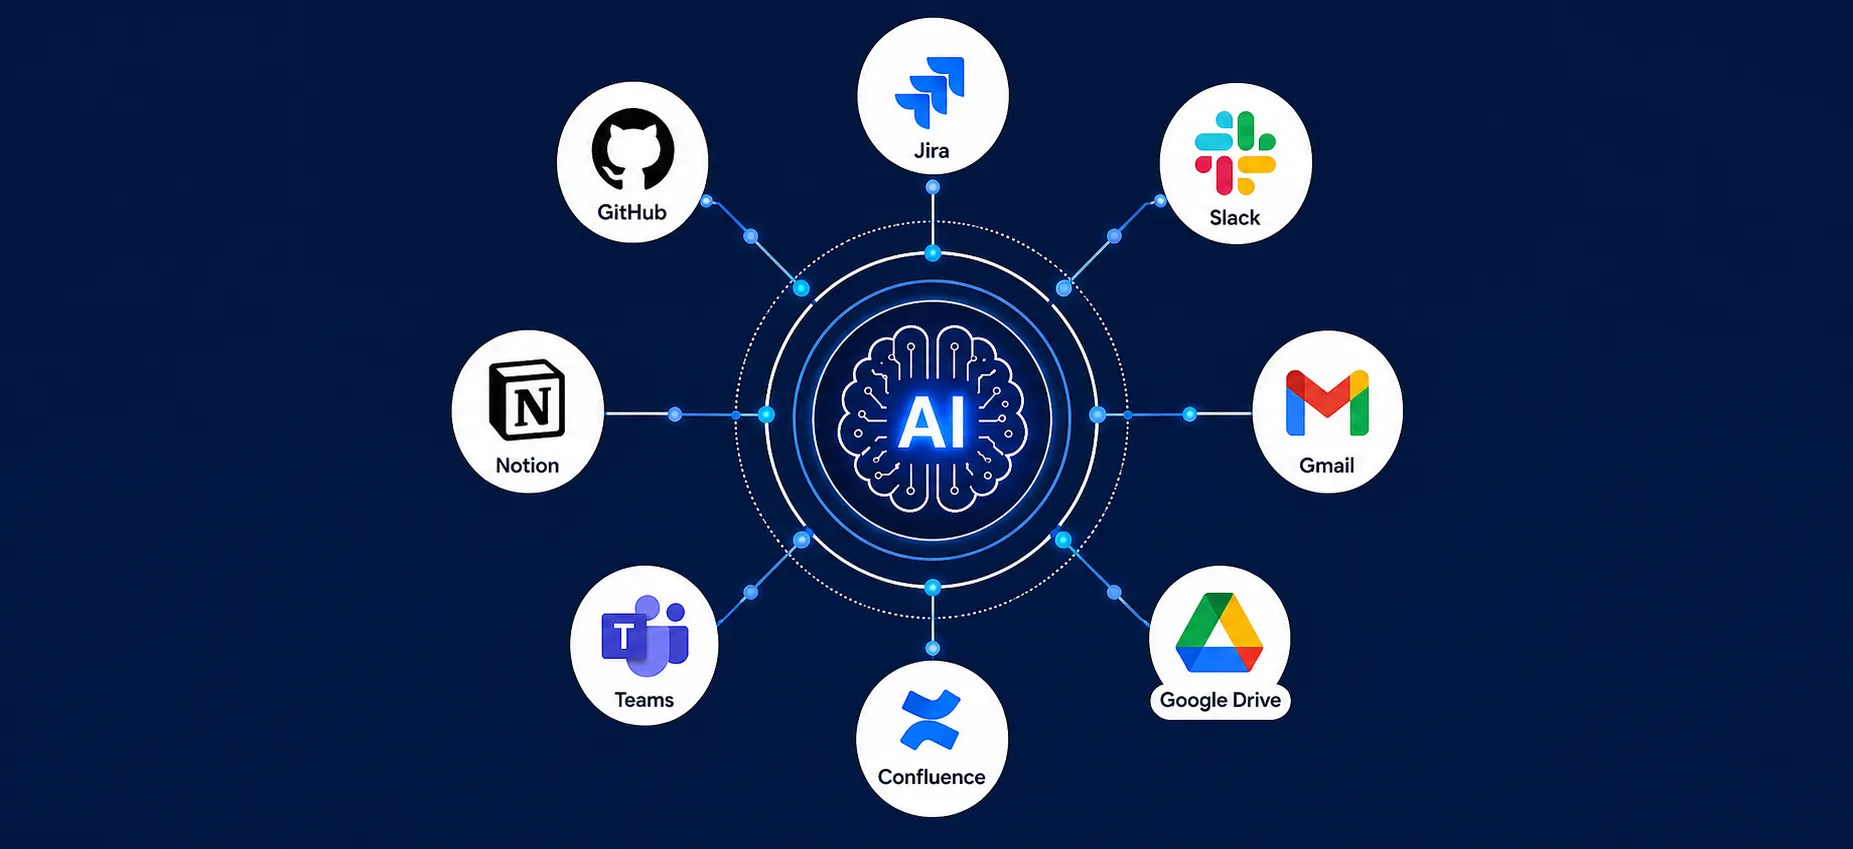
AI Integrations for QA Engineers
Learn how QA engineers can connect AI with Jira, GitHub, Slack, Notion and other tools to improve testing, bug tracking, reporting and QA productivity...
Read More
The Ultimate Guide to Amazon SES Setup with GoDaddy DNS
Learn how to set up Amazon SES with GoDaddy DNS. Complete step-by-step guide covering Easy DKIM, SPF, DMARC, custom MAIL FROM, and exiting the SES Sandbox...
Read More
AWS DevOps Agent Setup Guide with EC2
Learn how to set up AWS DevOps Agent with EC2, CloudWatch, IAM, and Agent Spaces for AI-assisted monitoring, incident investigation, and root-cause analysis...
Read More
Multi-Tenancy Patterns in DynamoDB: Silo, Pool, and Bridge Models
If you've already made the jump from a relational database to DynamoDB see our guide on moving relational data from SQL to DynamoDB...
Read More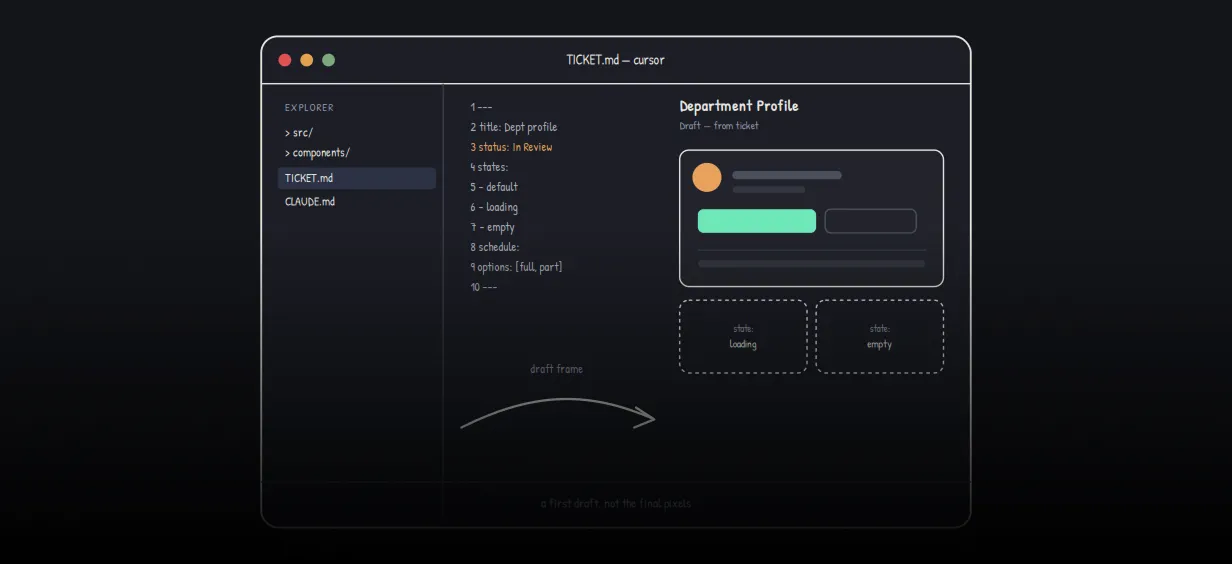
We stopped leaving the IDE to design. Here’s our Cursor → Figma flow
Cursor drafts fast, catches gaps early, and still clips fields and breaks layouts. Here's the real pros-and-cons breakdown of our workflow...
Read More
AWS DevOps Agent: How AI is Automating On-Call Incident Response
If you've ever been on call during a production outage, you know how stressful it can be. Alerts start firing, dashboards light up, and suddenly you're jumping between monitoring tools...
Read More
Catch Missing Images Before Deploy: A Simple Pre-Build Script for Next.js
How Omax Tech added a lightweight image validation gate to Next.js 15 builds on Vercel...
Read MoreReady to Work With Us?
Most engagements start with a 20-minute conversation. No pitch, no pressure - just an honest discussion about what you're building and whether we're the right fit.