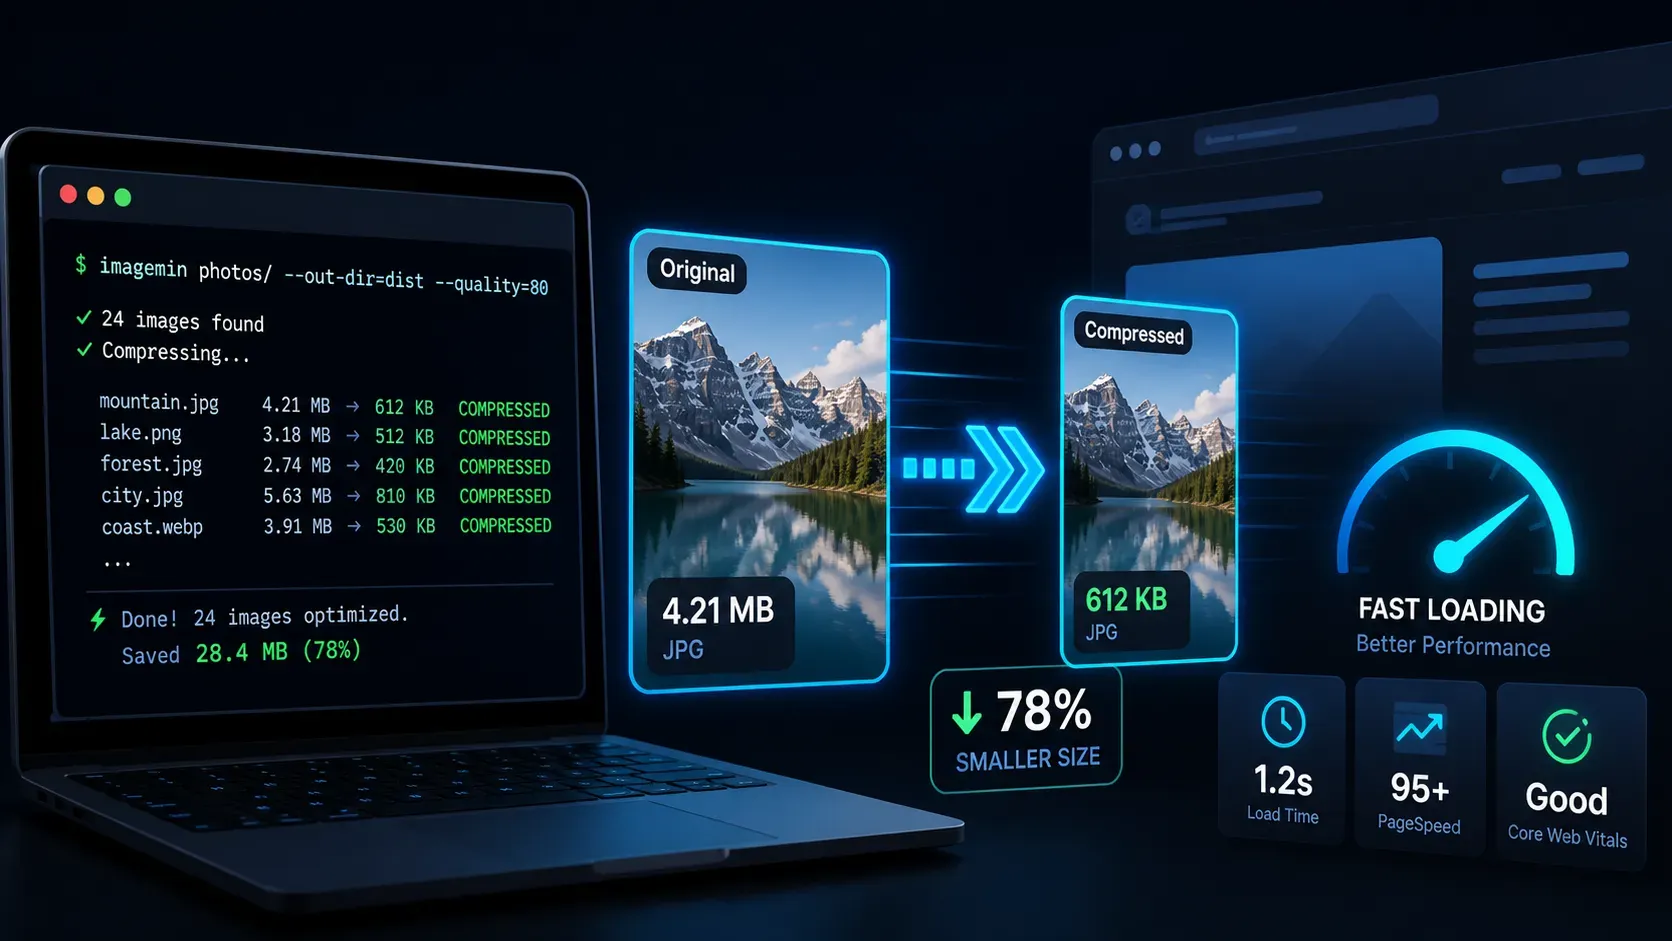
Build an Automated Image Compression Script with Sharp and SVGO

Introduction
Images are usually the heaviest assets on any website. A single uncompressed photo can push several megabytes down the wire, and a handful of them can tank your Largest Contentful Paint (LCP), inflate your Core Web Vitals scores, and slow down first load for visitors on slower connections.
Without a good workflow, compression becomes a manual, forgetful chore designers export, developers upload, and nobody remembers to shrink anything until Lighthouse complains.
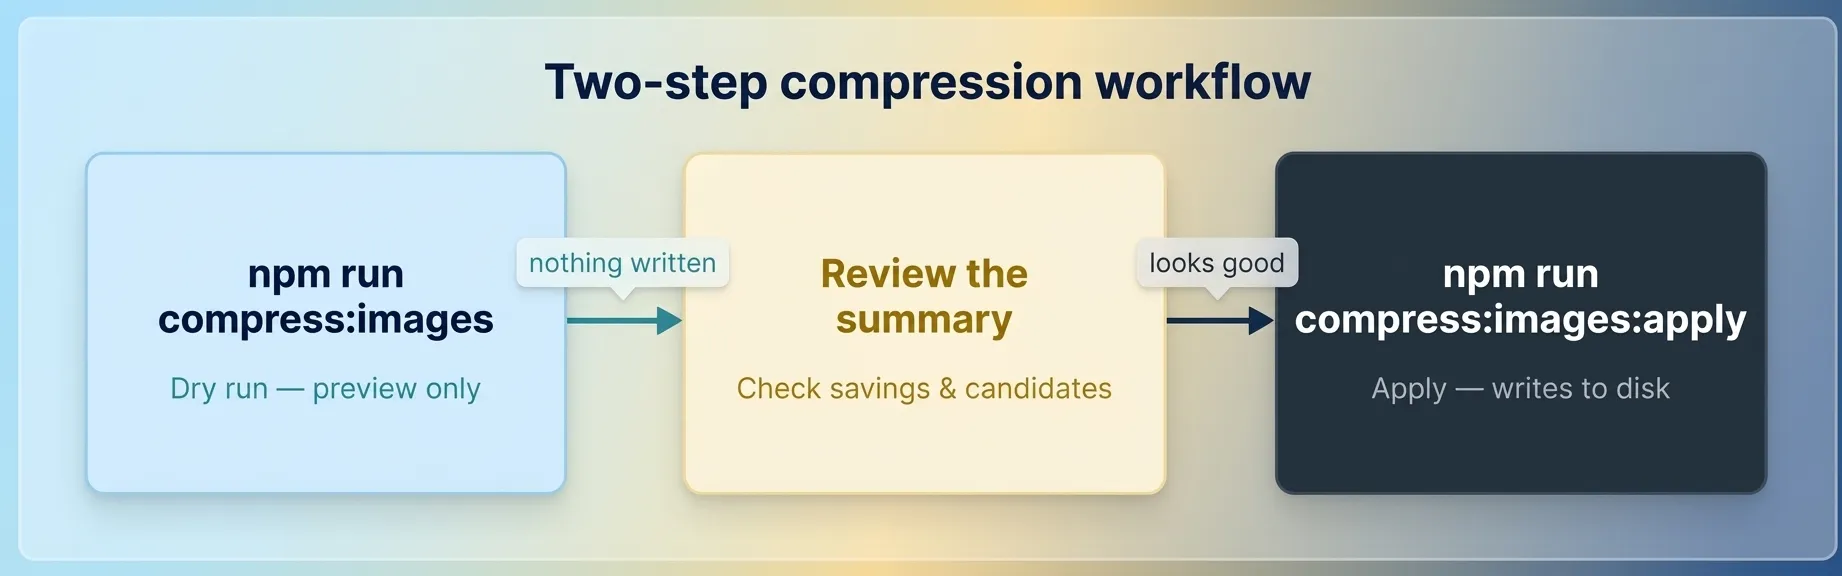
In this post, we share the exact workflow we use in our web application development projects: a terminal command that scans every image in the project, finds the heavy ones (over 100 KB), and compresses them automatically using two battle-tested libraries. Sharp for raster images (WebP, PNG, JPEG) and SVGO for SVG files. The best part? It runs in two safe steps so we can preview exactly what will change before touching any file.
Why Image Weight Matters
Before we get to commands, it's worth understanding what's at stake.
- Largest Contentful Paint (LCP): Large hero images are a common cause of slow LCP. If the biggest above-the-fold image is a giant PNG, the browser can't paint until most of it downloads.
- Bandwidth & cost: Every byte served is bandwidth your visitors pay for - on mobile data, that cost is very real.
- SEO & Core Web Vitals: Google uses real-world performance (field data) as a ranking factor. Slow pages lose visibility.
- Repository bloat: Oversized assets slow down clones, builds, and deployments.
Compressing images is one of the cheapest, highest-impact website performance wins available and unlike a lot of “performance work,” it takes minutes, not sprints.
The Tools Behind the Command
Our compression script uses two open-source libraries:
- Sharp: a high-performance Node.js image processing library that can resize, re-encode, and convert images with near-native speed. We use it for WebP, PNG, and JPEG.
- SVGO (SVG Optimizer): a tool that strips unnecessary metadata, comments, and redundant path data from SVG files, making them dramatically smaller without changing how they render.
Both are installed as dev dependencies in package.json, so they never ship to production they only run at build/dev time.
The Two-Step Safe Workflow
The whole workflow is designed to be non-destructive by default. We never write over an image until we've seen exactly what will happen.
Step 1 - Dry run (preview only)
npm run compress:images
This scans every image, calculates what it would compress, how much it would save, and prints the results. Nothing is written to disk.
Step 2 - Apply
npm run compress:images:apply
Only when we're happy with the preview do we run the apply command, which actually overwrites the files with their optimized versions.
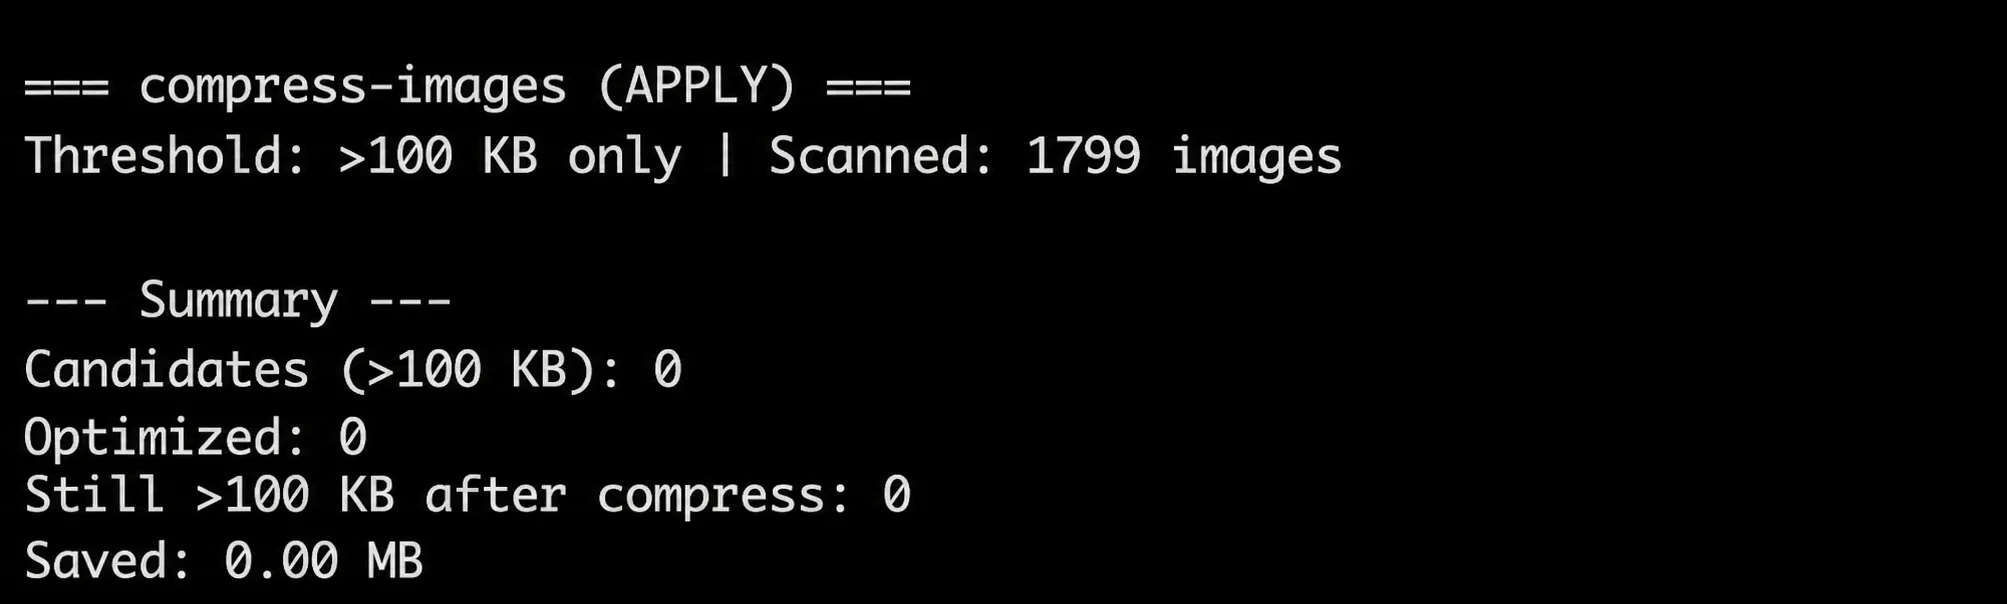
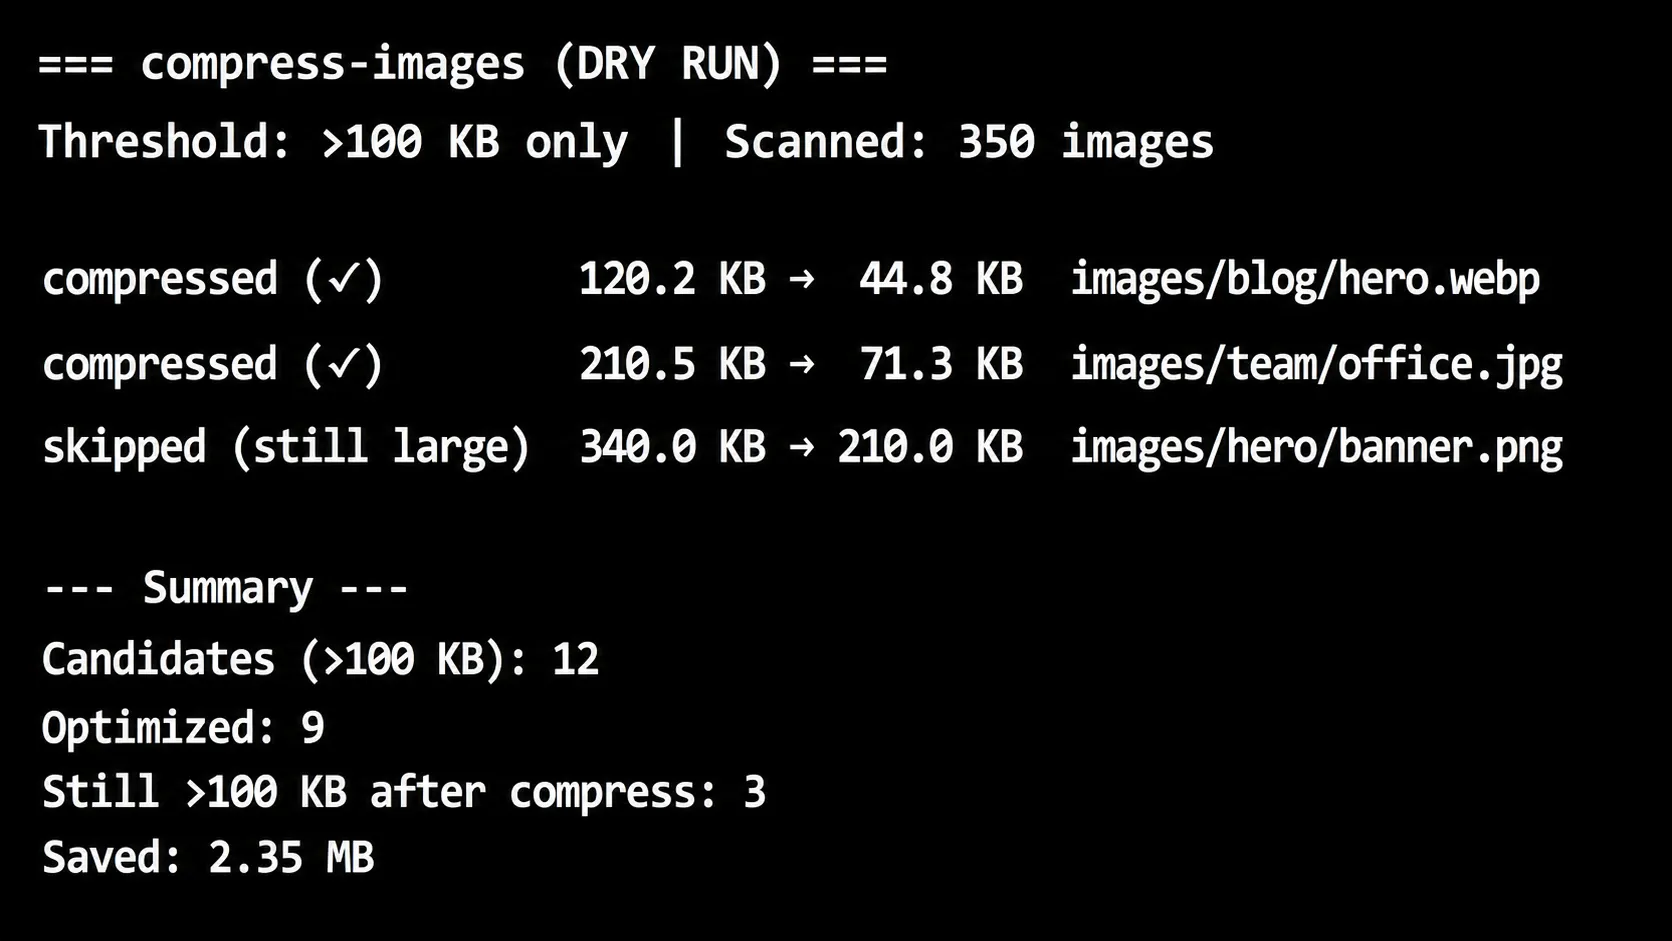
Note: The screenshots demonstrate the complete workflow. We first ran the script in DRY RUN mode to safely identify optimization candidates without modifying any files. Once verified, we ran it in APPLY mode to perform the actual compression and reduce image sizes.
This two-step flow prevents surprise changes and lets us review the impact before committing.
How the Script Decides What to Compress
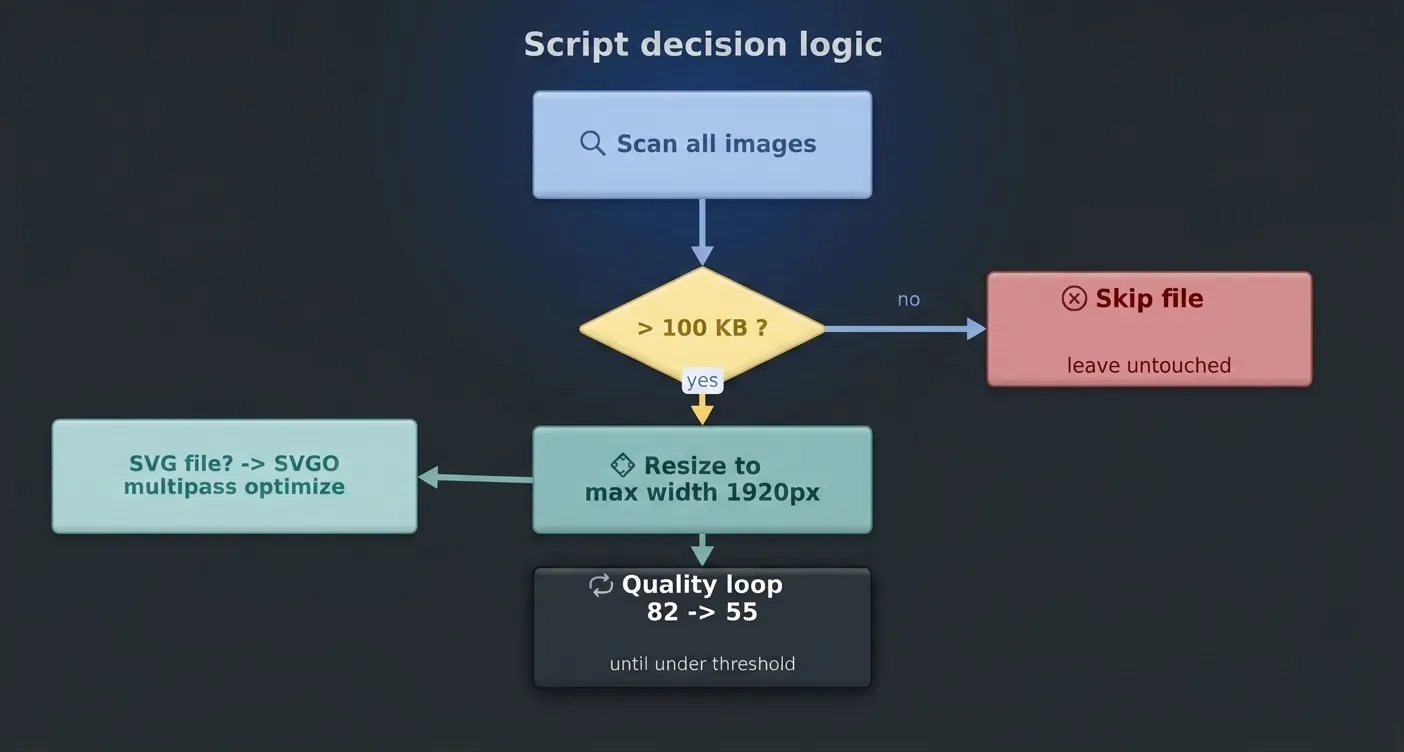
The script (scripts/compress-images.mjs) follows a simple, principled set of rules:
- 100 KB threshold: Only files larger than 100 KB are processed. Small assets are left alone compressing them wastes time and can even increase size.
- Max width of 1920px: Any image wider than 1920px is resized down. This covers virtually all real-world display sizes while avoiding pointless giant dimensions.
- A quality loop: Fresh images often start at quality 82, and the script progressively lowers quality (down to a floor of 55) until the file falls under the threshold. This “try until it fits” approach squeezes out maximum savings while keeping quality acceptable.
- SVG optimization: For SVG files, SVGO runs in multipass mode with the default preset to strip redundant data.
A quick note on that quality floor: dropping to 55 sounds aggressive, but for web-displayed raster images especially ones rendered at reduced widths in a responsive layout the visible difference is negligible. The eye rarely notices the drop; the network tab absolutely does.
These rules are configurable, so they scale to any project's needs.
A simplified look at the core logic
You don't need the full script to understand the idea here's the shape of the quality loop that does the heavy lifting for raster images:
import sharp from "sharp";const MAX_WIDTH = 1920;const SIZE_THRESHOLD = 100 * 1024; // 100 KBconst QUALITY_START = 82;const QUALITY_FLOOR = 55;async function compressRaster(inputBuffer, format) {let quality = QUALITY_START;let output = inputBuffer;while (quality >= QUALITY_FLOOR) {output = await sharp(inputBuffer).resize({ width: MAX_WIDTH, withoutEnlargement: true }).toFormat(format, { quality }).toBuffer();if (output.length <= SIZE_THRESHOLD) break;quality -= 5;}return output;}
The real script wraps this with file-walking, before/after size comparisons, the dry-run/apply flag, and SVGO handling for .svg files but this is the piece doing the actual work.
Understanding the Output
When you run the dry-run command, you get a clean summary:
=== compress-images (DRY RUN) ===Threshold: >100 KB only | Scanned: 350 imagescompressed (✓) 120.2 KB → 44.8 KB images/blog/hero.webpcompressed (✓) 210.5 KB → 71.3 KB images/team/office.jpgskipped (still large) 340.0 KB → 210.0 KB images/hero/banner.png--- Summary ---Candidates (>100 KB): 12Optimized: 9Still >100 KB after compress: 3Saved: 2.35 MB
Each line shows the file path, its size before and after, and whether it's now under 100 KB. The summary tells you how many files qualify, how many got optimized, and critically how many are still over 100 KB, so you know which need a human decision (like a redesign, cropping, or manual optimization).
That “still >100 KB” bucket matters. It's usually images that are already near the quality floor and can't shrink further without visibly degrading a signal to resize the source asset itself, not just re-run the script.
Wiring It Into the Project
Rather than running a long node command every time, we add it as an npm script:
"scripts": {"compress:images": "node scripts/compress-images.mjs","compress:images:apply": "node scripts/compress-images.mjs --apply"}
This makes the workflow a single, memorable command.
We also hook a separate validation script into the prebuild step, so broken or missing image references are caught before a production build:
"prebuild": "npm run validate:images"
validate:images (scripts/validate-images.mjs) is a lightweight companion script it doesn't compress anything, it just walks the codebase for <img> tags, next/image calls, and CSS background-image references, then confirms the file each one points to actually exists on disk. It catches typos, renamed files, and stale references before they turn into a broken-image icon in production.
Catching image problems early keeps deployments clean and predictable.
When to Run It
We recommend making compression part of your routine, not an afterthought:
- After adding new images - before committing.
- Before every release/build - as part of a quick sanity pass.
- On a schedule - old repos accumulate heavy assets over time; a periodic run keeps them lean.
You can even wire the apply command into your CI pipeline so every merge automatically shrinks any newly added heavy images for example, as a step that runs compress:images:apply and fails the build if it finds files it can't get under the threshold, forcing a manual look before merge.
Final Words
Fast websites don't happen by accident they happen because the team has a repeatable, low-effort workflow. A single terminal command that finds and compresses heavy images is one of the simplest ways to keep your site fast, your visitors happy, and your performance scores green.
Automate it, run it often, and let your images work for your performance not against it.
If you want to try this on your own project, the pattern above (Sharp for raster + SVGO for SVGs, gated behind a dry-run) drops into almost any Node.js codebase with minimal setup no build tool lock-in required.

The Right Way to Migrate from MySQL to AWS Aurora DSQL
Migrating a production database is one of the highest-risk changes you can make to an application. Moving from MySQL to AWS Aurora DSQL raises the stakes further...
Read More
From Memory Nightmare to Serverless: Bundling Files into a ZIP with AWS Lambda
A straightforward 'download all these files as one ZIP' request that worked perfectly on my laptop and... fell over the first day it met real production load. Here's the debugging story, the scaling options I ruled out, and why AWS Lambda was the right answer.
Read More
Clean Code vs. Overengineering: Where Should Developers Draw the Line?
Clean code reduces unnecessary complexity; overengineering invents it. A practical guide to using context, evidence, and the cost of change to know when to stop adding abstractions...
Read More
Kafka vs RabbitMQ vs AWS EventBridge: Choosing the Right Architecture Based on Business Requirements
Compare Kafka, RabbitMQ, and AWS EventBridge based on scalability, routing, event streaming, replay, infrastructure, and business requirements to choose the right architecture...
Read More
AI Integrations for QA Engineers
Learn how QA engineers can connect AI with Jira, GitHub, Slack, Notion and other tools to improve testing, bug tracking, reporting and QA productivity...
Read More
The Ultimate Guide to Amazon SES Setup with GoDaddy DNS
Learn how to set up Amazon SES with GoDaddy DNS. Complete step-by-step guide covering Easy DKIM, SPF, DMARC, custom MAIL FROM, and exiting the SES Sandbox...
Read More
AWS DevOps Agent Setup Guide with EC2
Learn how to set up AWS DevOps Agent with EC2, CloudWatch, IAM, and Agent Spaces for AI-assisted monitoring, incident investigation, and root-cause analysis...
Read More
Multi-Tenancy Patterns in DynamoDB: Silo, Pool, and Bridge Models
If you've already made the jump from a relational database to DynamoDB see our guide on moving relational data from SQL to DynamoDB...
Read More
We stopped leaving the IDE to design. Here’s our Cursor → Figma flow
Cursor drafts fast, catches gaps early, and still clips fields and breaks layouts. Here's the real pros-and-cons breakdown of our workflow...
Read MoreReady to Work With Us?
Most engagements start with a 20-minute conversation. No pitch, no pressure - just an honest discussion about what you're building and whether we're the right fit.