
Streamlining ETL (Part 2) – Building AWS Glue Connections and ETL Pipelines for Snowflake

Introduction
In Part 1, we focused on securely setting up the AWS Glue and Snowflake integration, including IAM roles, and Secrets Manager. Now it’s time to move towards the core functionality—building the actual ETL pipeline using AWS Glue Studio and connecting it to Snowflake!
This blog will cover:
- Creating a secure AWS Glue connection to Snowflake.
- Building an end-to-end ETL job using Glue Studio.
- Applying data transformations (mapping, type conversions).
Create AWS Glue Connection to Snowflake
- Go to AWS Glue > Data Catalog > Connections > Create Connection.
- Select Snowflake as your data source.
- Click Next
- Now For Host and Port in connection, go to your snowflake and run command
- Use role AccountAdmin;
- SELECT SYSTEM$ALLOWLIST();
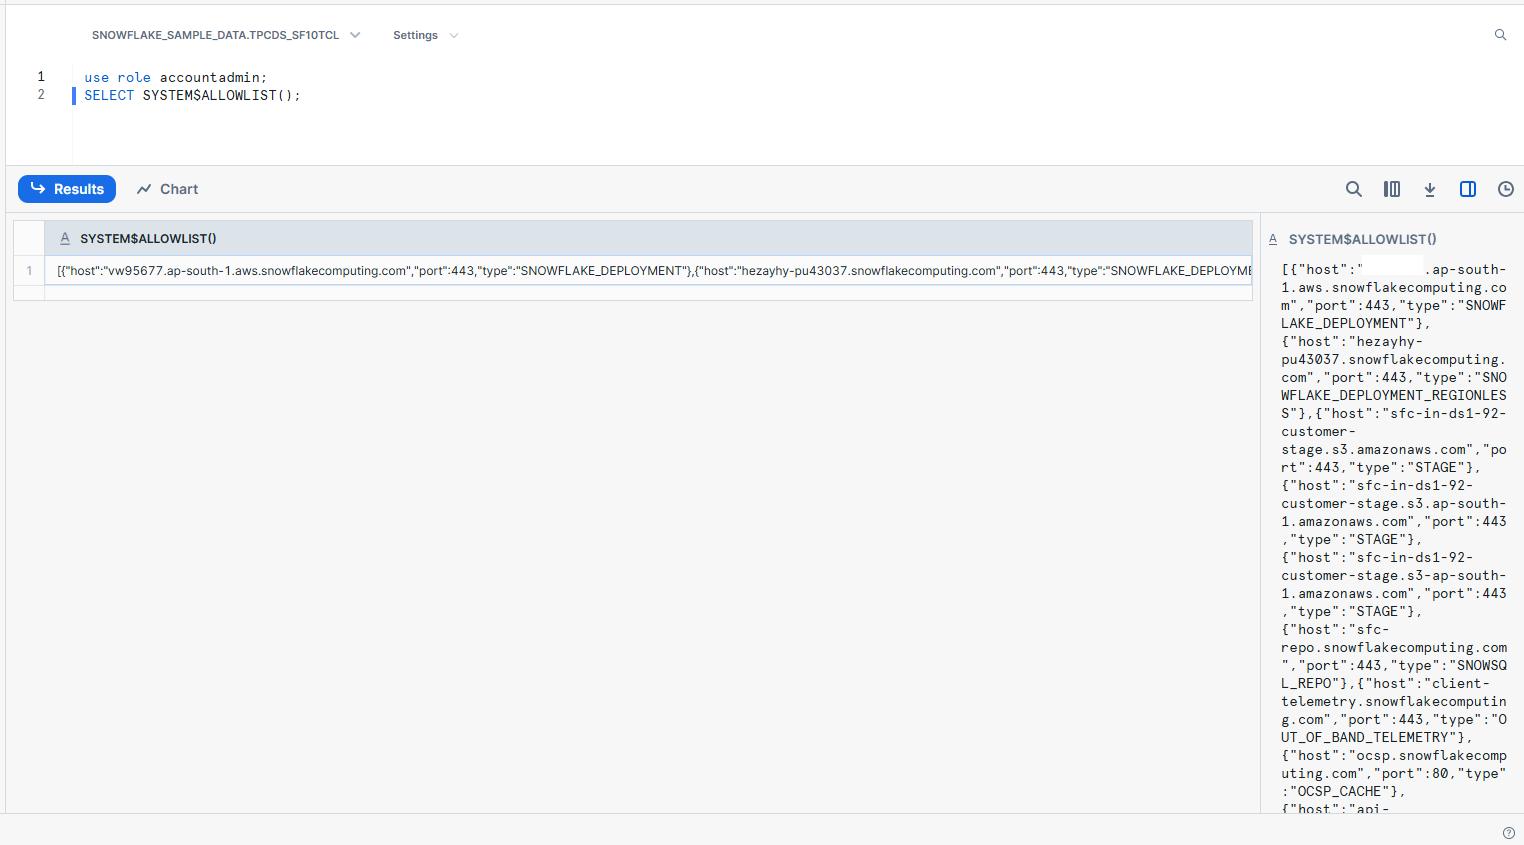
The code first link in the dialog is the Host and Port 443 is also given.
- Add Host and Port here.
- Select the IAM Role created in Part 1.
- Select the secret created in Part 1.
- Click Test Connection, if success than click next, verify your snowflake credentials.
- Provide a name to connection.
- Review and Create Connection.
Build a Visual Glue Job
Why Visual ETL in AWS Glue Studio?
AWS Glue Studio simplifies ETL development using a drag-and-drop interface while still allowing custom code injections via auto-generated PySpark scripts. It’s ideal for:
- Data Engineers who prefer no-code/low-code workflows.
- Teams seeking faster pipeline prototyping.
- Anyone who wants the flexibility of switching between visual + code-based ETL.
Steps
- 1Go to AWS Glue > ETL jobs > Visual ETL.
- 2Select S3 as a Source, Apply Mapping node for data transformation, and than select target snowflake.
- 3Now we will start configuring all three nodes.
Data Source – S3 Bucket
- Provide the s3 URL for the file we want from s3 to be pushed to snowflake.
- Provide format as csv.
- In left, select the IAM role created in part 1.
- After selecting the IAM role it will automatically start reading the file and will start to display some rows of data.
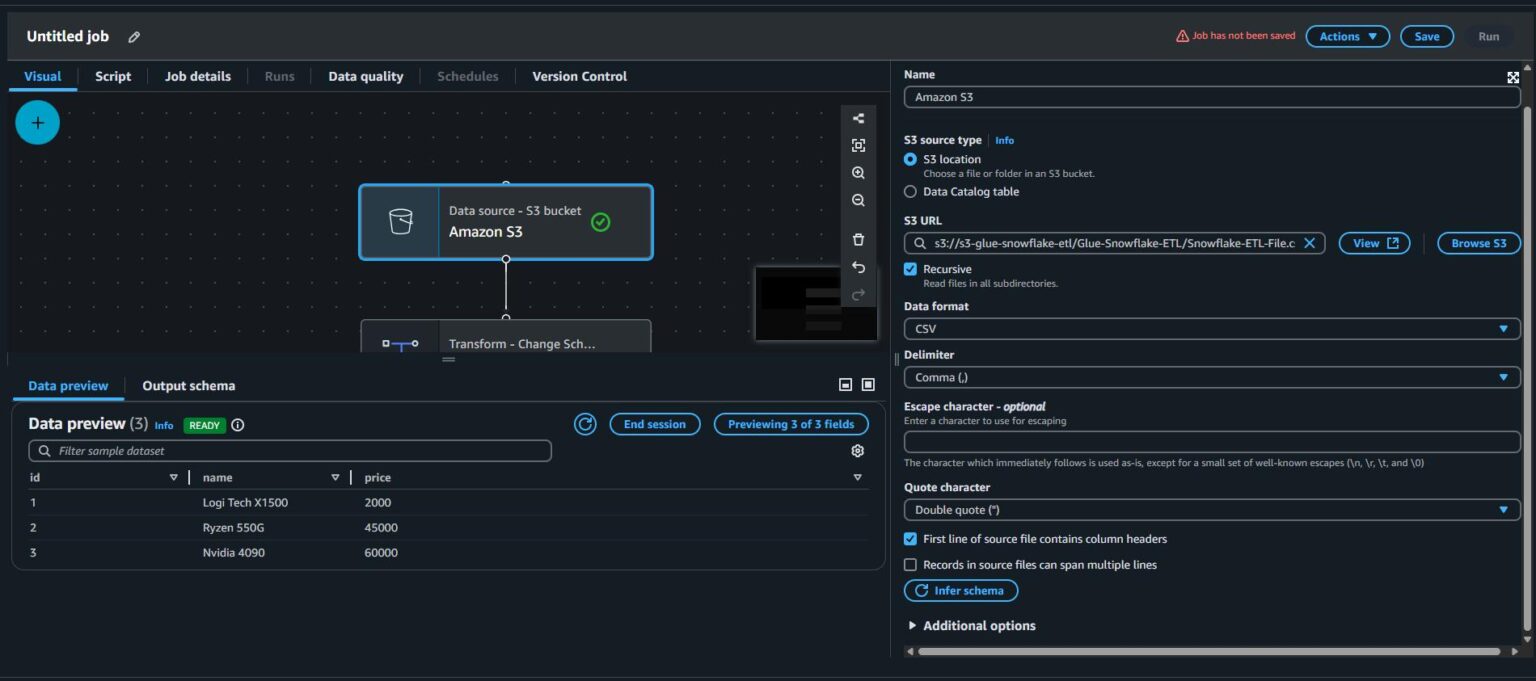
Transform – Change Schema
This step displays all the columns from the source file along with their inferred data types, and also allows you to modify these data types before loading the data into the target database.
Like initially all three types were string.
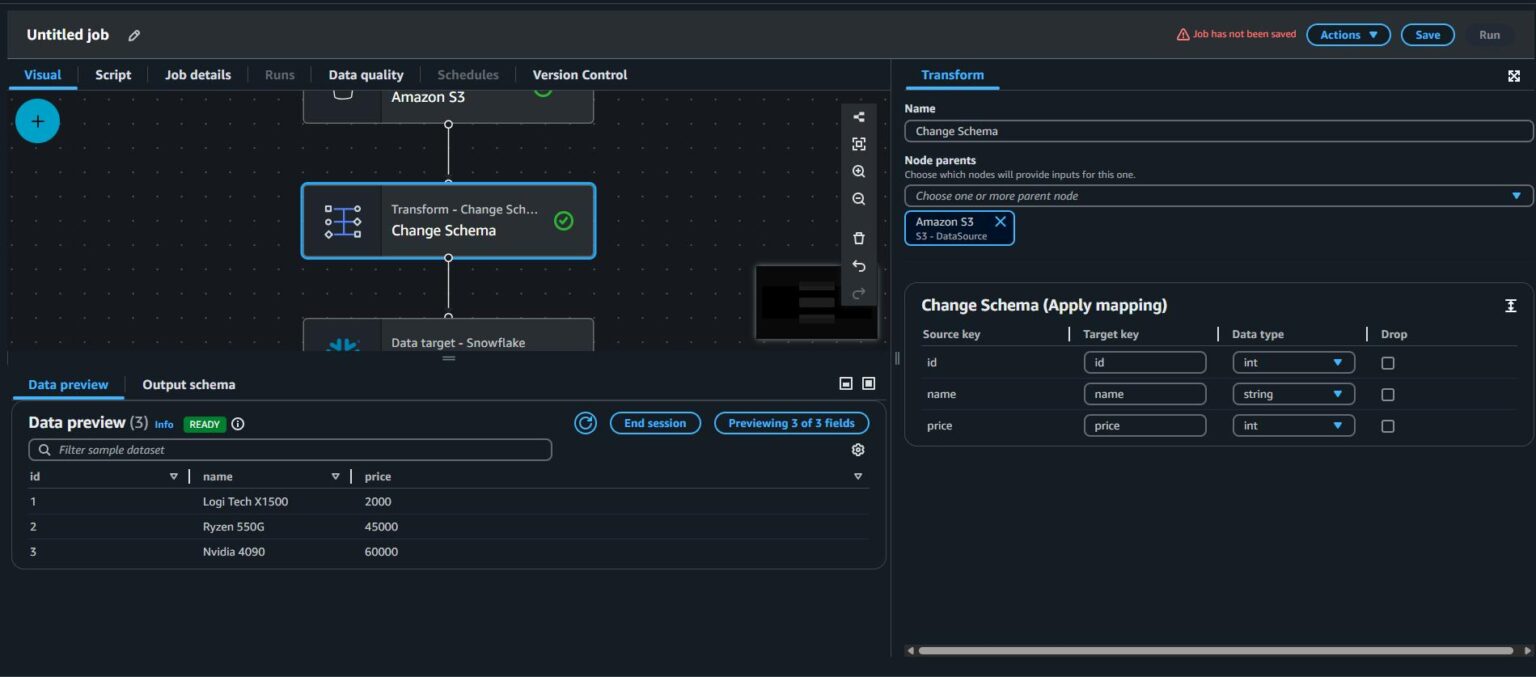
I updated the schema for id and price, changed the data type to int.
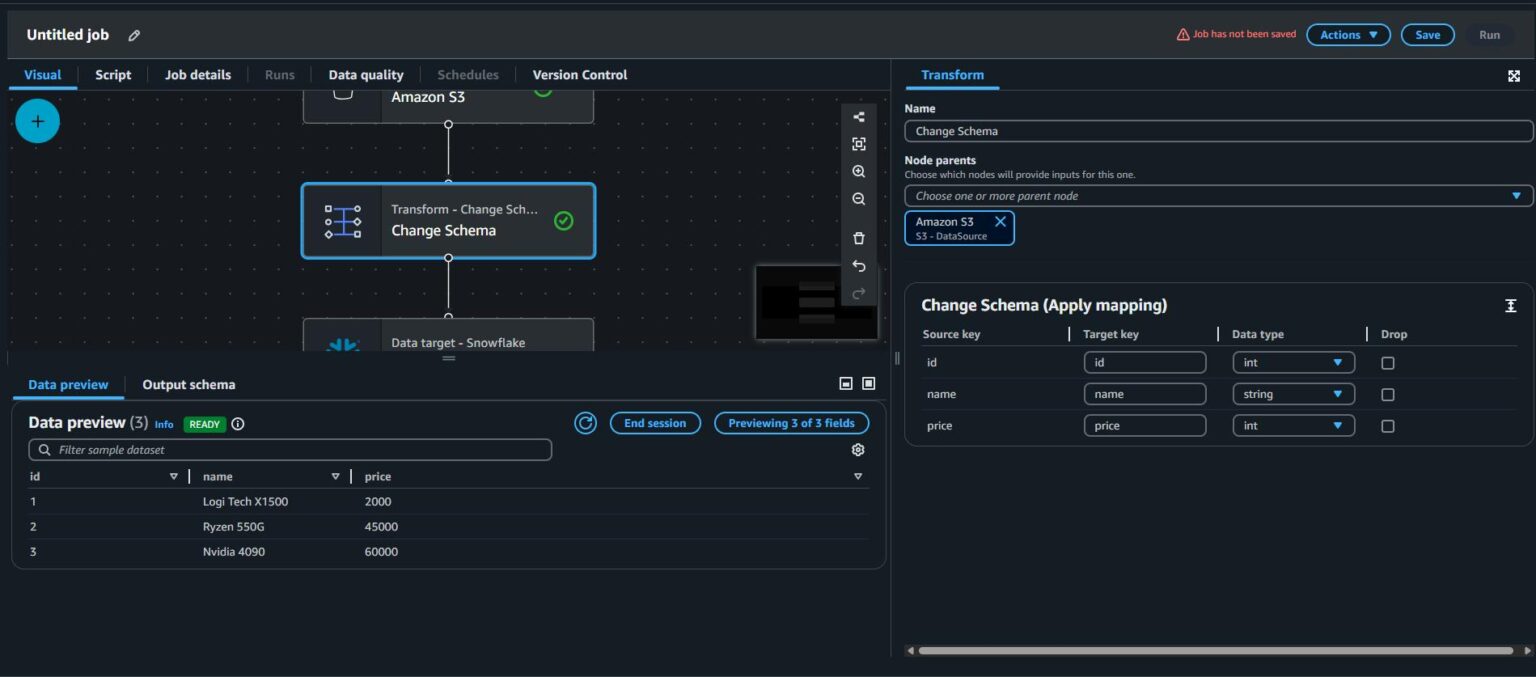
Snowflake Database Setup
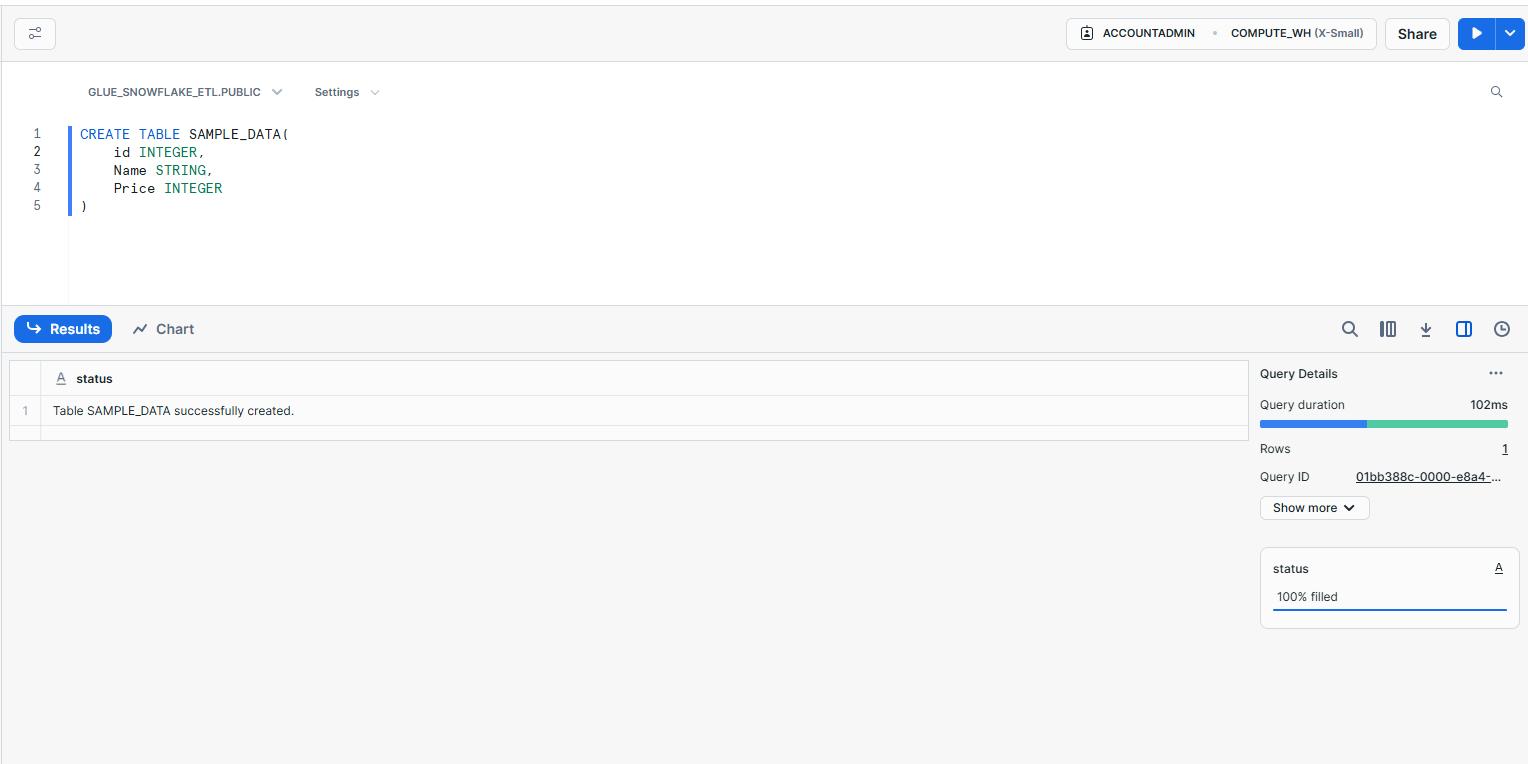
- Now go to your snowflake and create a table in a database with the definition of the data.
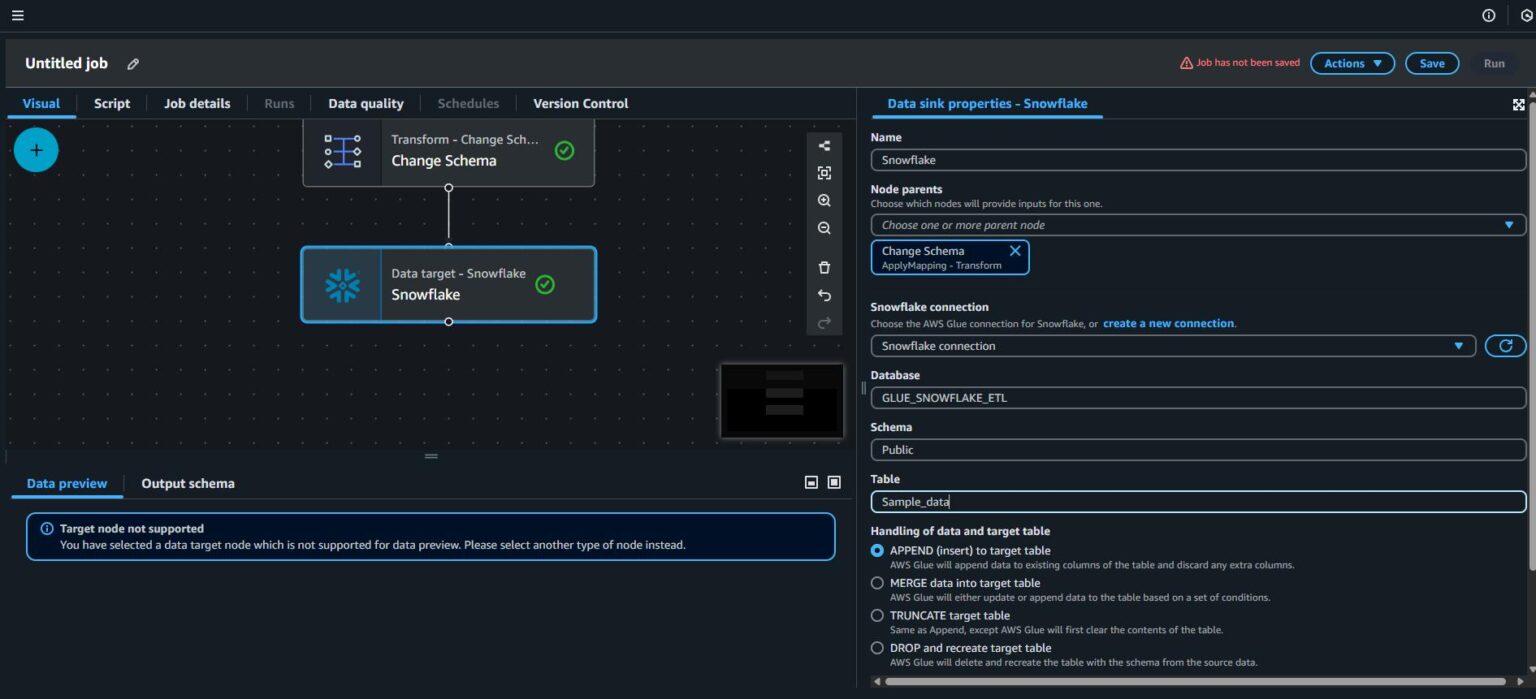
Data target- Snowflake node
- Select the snowflake connection made in the previous step.
- Enter the name of your database, schema, and table in snowflake.
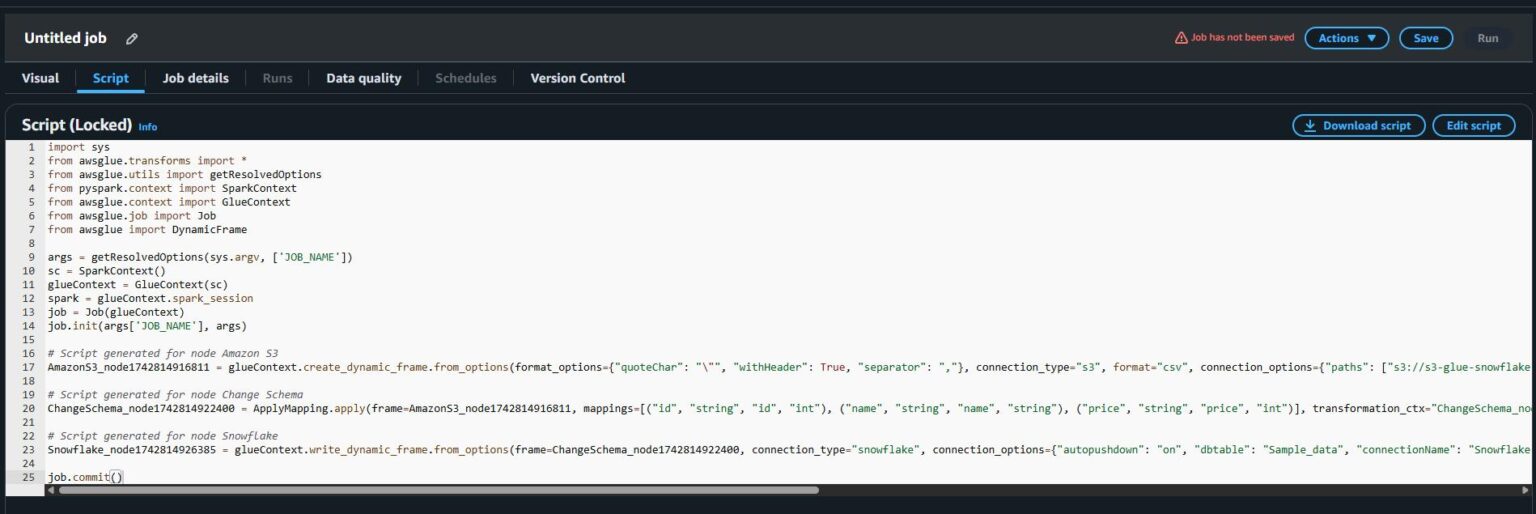
Review & Edit Auto-Generated Python (PySpark) Script
Click on “Script” tab to view your auto-generated Glue script.
Customizing the Script (Optional)
For more advanced use cases, you can:
- Add data cleansing logic (e.g., removing nulls).
- Insert conditional logic (e.g., only load data where price > 0).
- Integrate custom logging using AWS CloudWatch or external monitoring tools.
Saving and Running
- Give a name to a job and save the job.
- Now run the job.
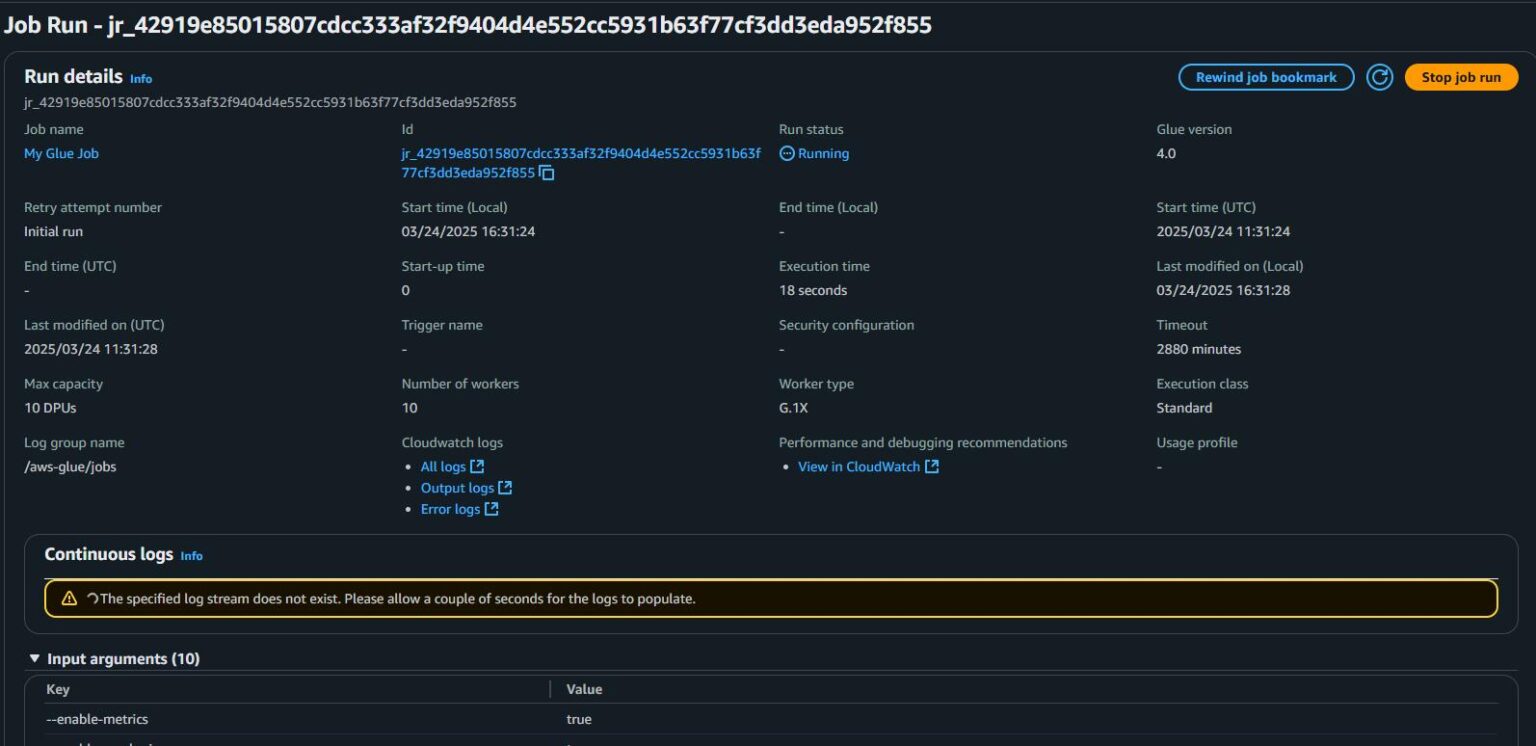
- Go to AWS Glue > ETL Jobs > Job run monitoring
- View your job running.
Verification
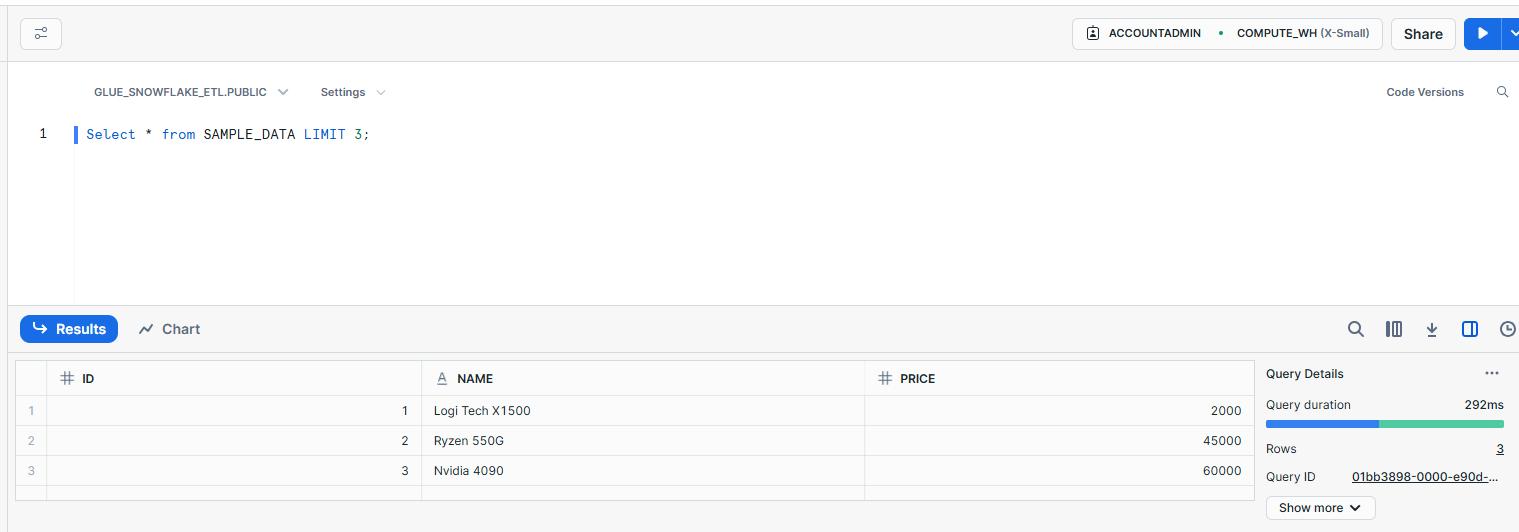
- Once your job completes successfully, switch to Snowflake and query your table. You should see the ingested records from S3!
Conclusion
In this two-part series, we walked through the complete journey of securely integrating AWS Glue with Snowflake to build a scalable and production-ready ETL pipeline.
In Part 1, we focused on laying the groundwork. We discussed why each prerequisite is critical, including the role of IAM for enforcing least privilege access, and the significance of AWS Secrets Manager for secure credential management. These foundational steps ensure that your pipeline is not only functional but also aligned with security and governance best practices.
In Part 2, we brought everything together to create the actual Glue ETL job. Leveraging the IAM role and securely stored Snowflake credentials from Part 1, we established a Glue connection to Snowflake. From there, we designed a visual ETL job, configured our S3 source and Snowflake target, applied schema mappings, and customized Glue-generated PySpark scripts for flexibility.
By combining strong upfront setup (IAM, Secrets) with proper Glue job design, you’ve now built a secure, automated, and production-ready pipeline capable of transferring and transforming data seamlessly between AWS and Snowflake.
Clean Code vs. Overengineering: Where Should Developers Draw the Line?
Clean code reduces unnecessary complexity; overengineering invents it. A practical guide to using context, evidence, and the cost of change to know when to stop adding abstractions...
Read More
Kafka vs RabbitMQ vs AWS EventBridge: Choosing the Right Architecture Based on Business Requirements
Compare Kafka, RabbitMQ, and AWS EventBridge based on scalability, routing, event streaming, replay, infrastructure, and business requirements to choose the right architecture...
Read More
AI Integrations for QA Engineers
Learn how QA engineers can connect AI with Jira, GitHub, Slack, Notion and other tools to improve testing, bug tracking, reporting and QA productivity...
Read More
The Ultimate Guide to Amazon SES Setup with GoDaddy DNS
Learn how to set up Amazon SES with GoDaddy DNS. Complete step-by-step guide covering Easy DKIM, SPF, DMARC, custom MAIL FROM, and exiting the SES Sandbox...
Read More
AWS DevOps Agent Setup Guide with EC2
Learn how to set up AWS DevOps Agent with EC2, CloudWatch, IAM, and Agent Spaces for AI-assisted monitoring, incident investigation, and root-cause analysis...
Read More
Multi-Tenancy Patterns in DynamoDB: Silo, Pool, and Bridge Models
If you've already made the jump from a relational database to DynamoDB see our guide on moving relational data from SQL to DynamoDB...
Read More
We stopped leaving the IDE to design. Here’s our Cursor → Figma flow
Cursor drafts fast, catches gaps early, and still clips fields and breaks layouts. Here's the real pros-and-cons breakdown of our workflow...
Read More
AWS DevOps Agent: How AI is Automating On-Call Incident Response
If you've ever been on call during a production outage, you know how stressful it can be. Alerts start firing, dashboards light up, and suddenly you're jumping between monitoring tools...
Read More
Catch Missing Images Before Deploy: A Simple Pre-Build Script for Next.js
How Omax Tech added a lightweight image validation gate to Next.js 15 builds on Vercel...
Read MoreReady to Work With Us?
Most engagements start with a 20-minute conversation. No pitch, no pressure - just an honest discussion about what you're building and whether we're the right fit.